Landscape Lighting Ideas for St. Louis Homes: Extend Your Outdoor Season
A well-designed landscape lighting system turns your yard from a place you leave at sundown into one you use until midnight. In St. Louis, where evenings stay warm from May through October, that is roughly five extra hours of outdoor time every day -- and it starts the moment the sun drops behind the tree line around 8:15 PM this time of year.
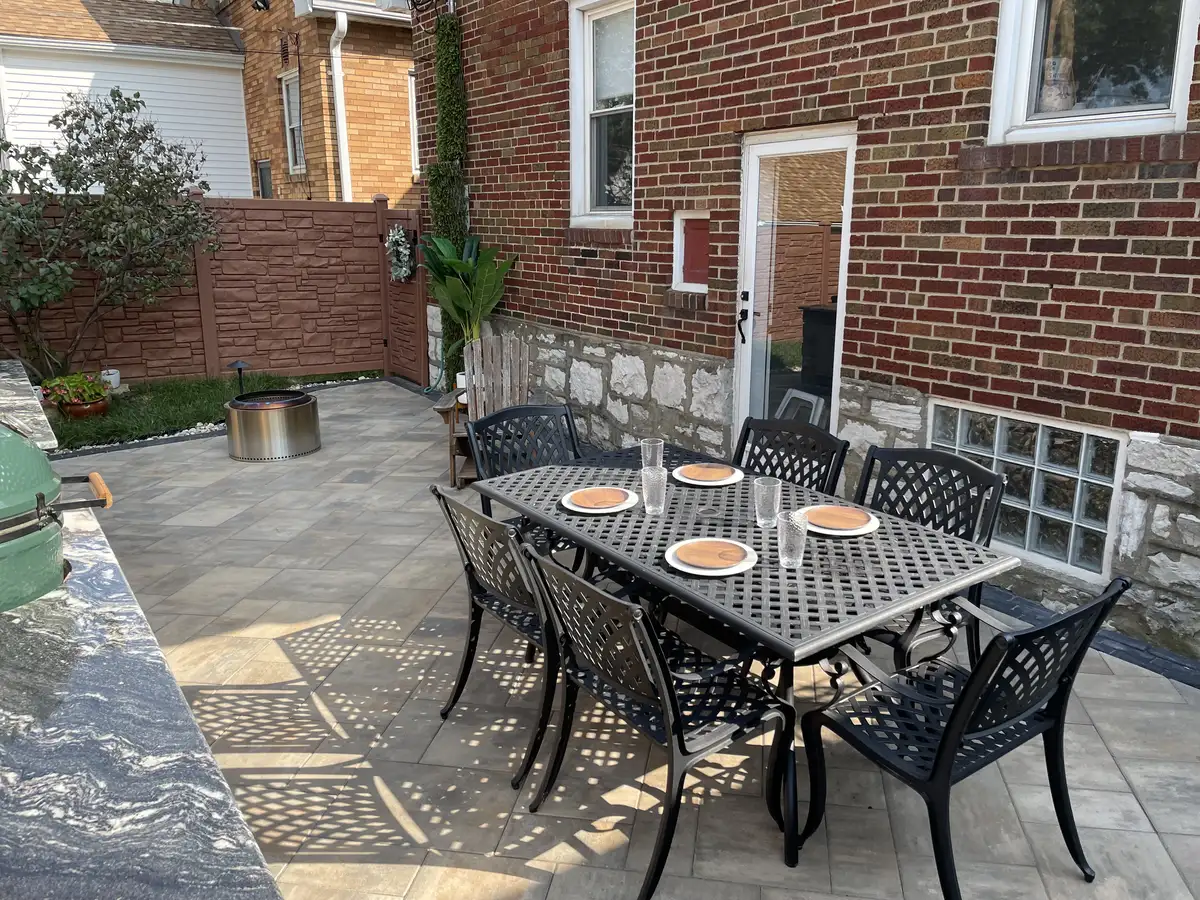
Lighting is also one of the highest-return upgrades you can make to an existing outdoor space. If you already have a paver patio, a set of retaining walls, or an outdoor kitchen and fire feature, landscape lighting makes all of it more visible, more usable, and more impressive after dark. It adds security, too -- a lit property is significantly less likely to be targeted by opportunistic crime.
After installing lighting systems across the St. Louis metro for over 20 years, here are the approaches that work best for our climate, our architecture, and the way people actually use their outdoor spaces in the greater St. Louis area.
Path Lighting: The Foundation of Every System
Path lights are the most common starting point, and for good reason. They solve the most basic problem: being able to walk safely from your back door to the patio, fire pit, or pool area without tripping over a step, tree root, or grade change in the dark.
In St. Louis, most residential properties have at least one elevation change between the house and the main outdoor living area. The rolling terrain across Jefferson County, south St. Louis County, and many St. Charles County neighborhoods means your backyard walkway probably drops or climbs a foot or two along its length. Path lights placed every 6 to 8 feet along a walkway make those grade changes visible and safe.
The best path lights for St. Louis installations are low-voltage LED fixtures rated for outdoor use. LED uses about 80 percent less electricity than halogen, the bulbs last 15 to 20 years under normal use, and they produce minimal heat -- important when fixtures sit near mulch beds, ornamental grasses, or ground cover plantings that could dry out in our July and August heat.
Placement Tips for Walkway Lights
- Stagger, do not line up. Path lights placed in a straight row on one side of a walkway look institutional. Instead, stagger them on alternating sides at irregular intervals. This creates a natural rhythm and avoids the airport-runway look that many homeowners end up with.
- Light the destination, not just the path. Place one or two fixtures at the end of the walkway -- near the patio edge, the fire pit, or the pool gate. This draws the eye forward and makes the space feel inviting rather than just functional.
- Account for plantings. If your walkway runs through or alongside planting beds, keep fixtures positioned so that mature plants will not block the light in two or three years. Hostas, daylilies, and ornamental grasses common in St. Louis landscapes grow significantly wider than most homeowners expect.
Step and Wall Lighting: Where Safety Meets Design
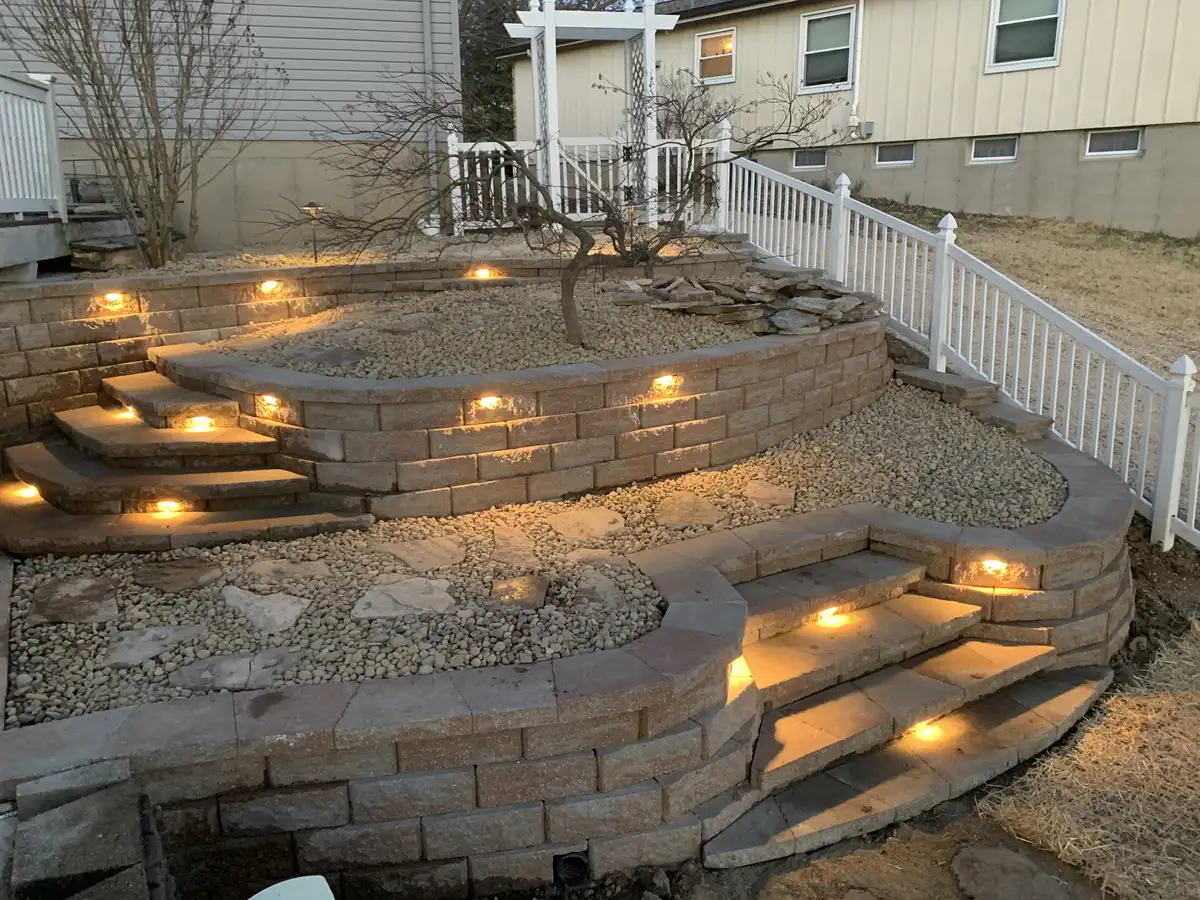
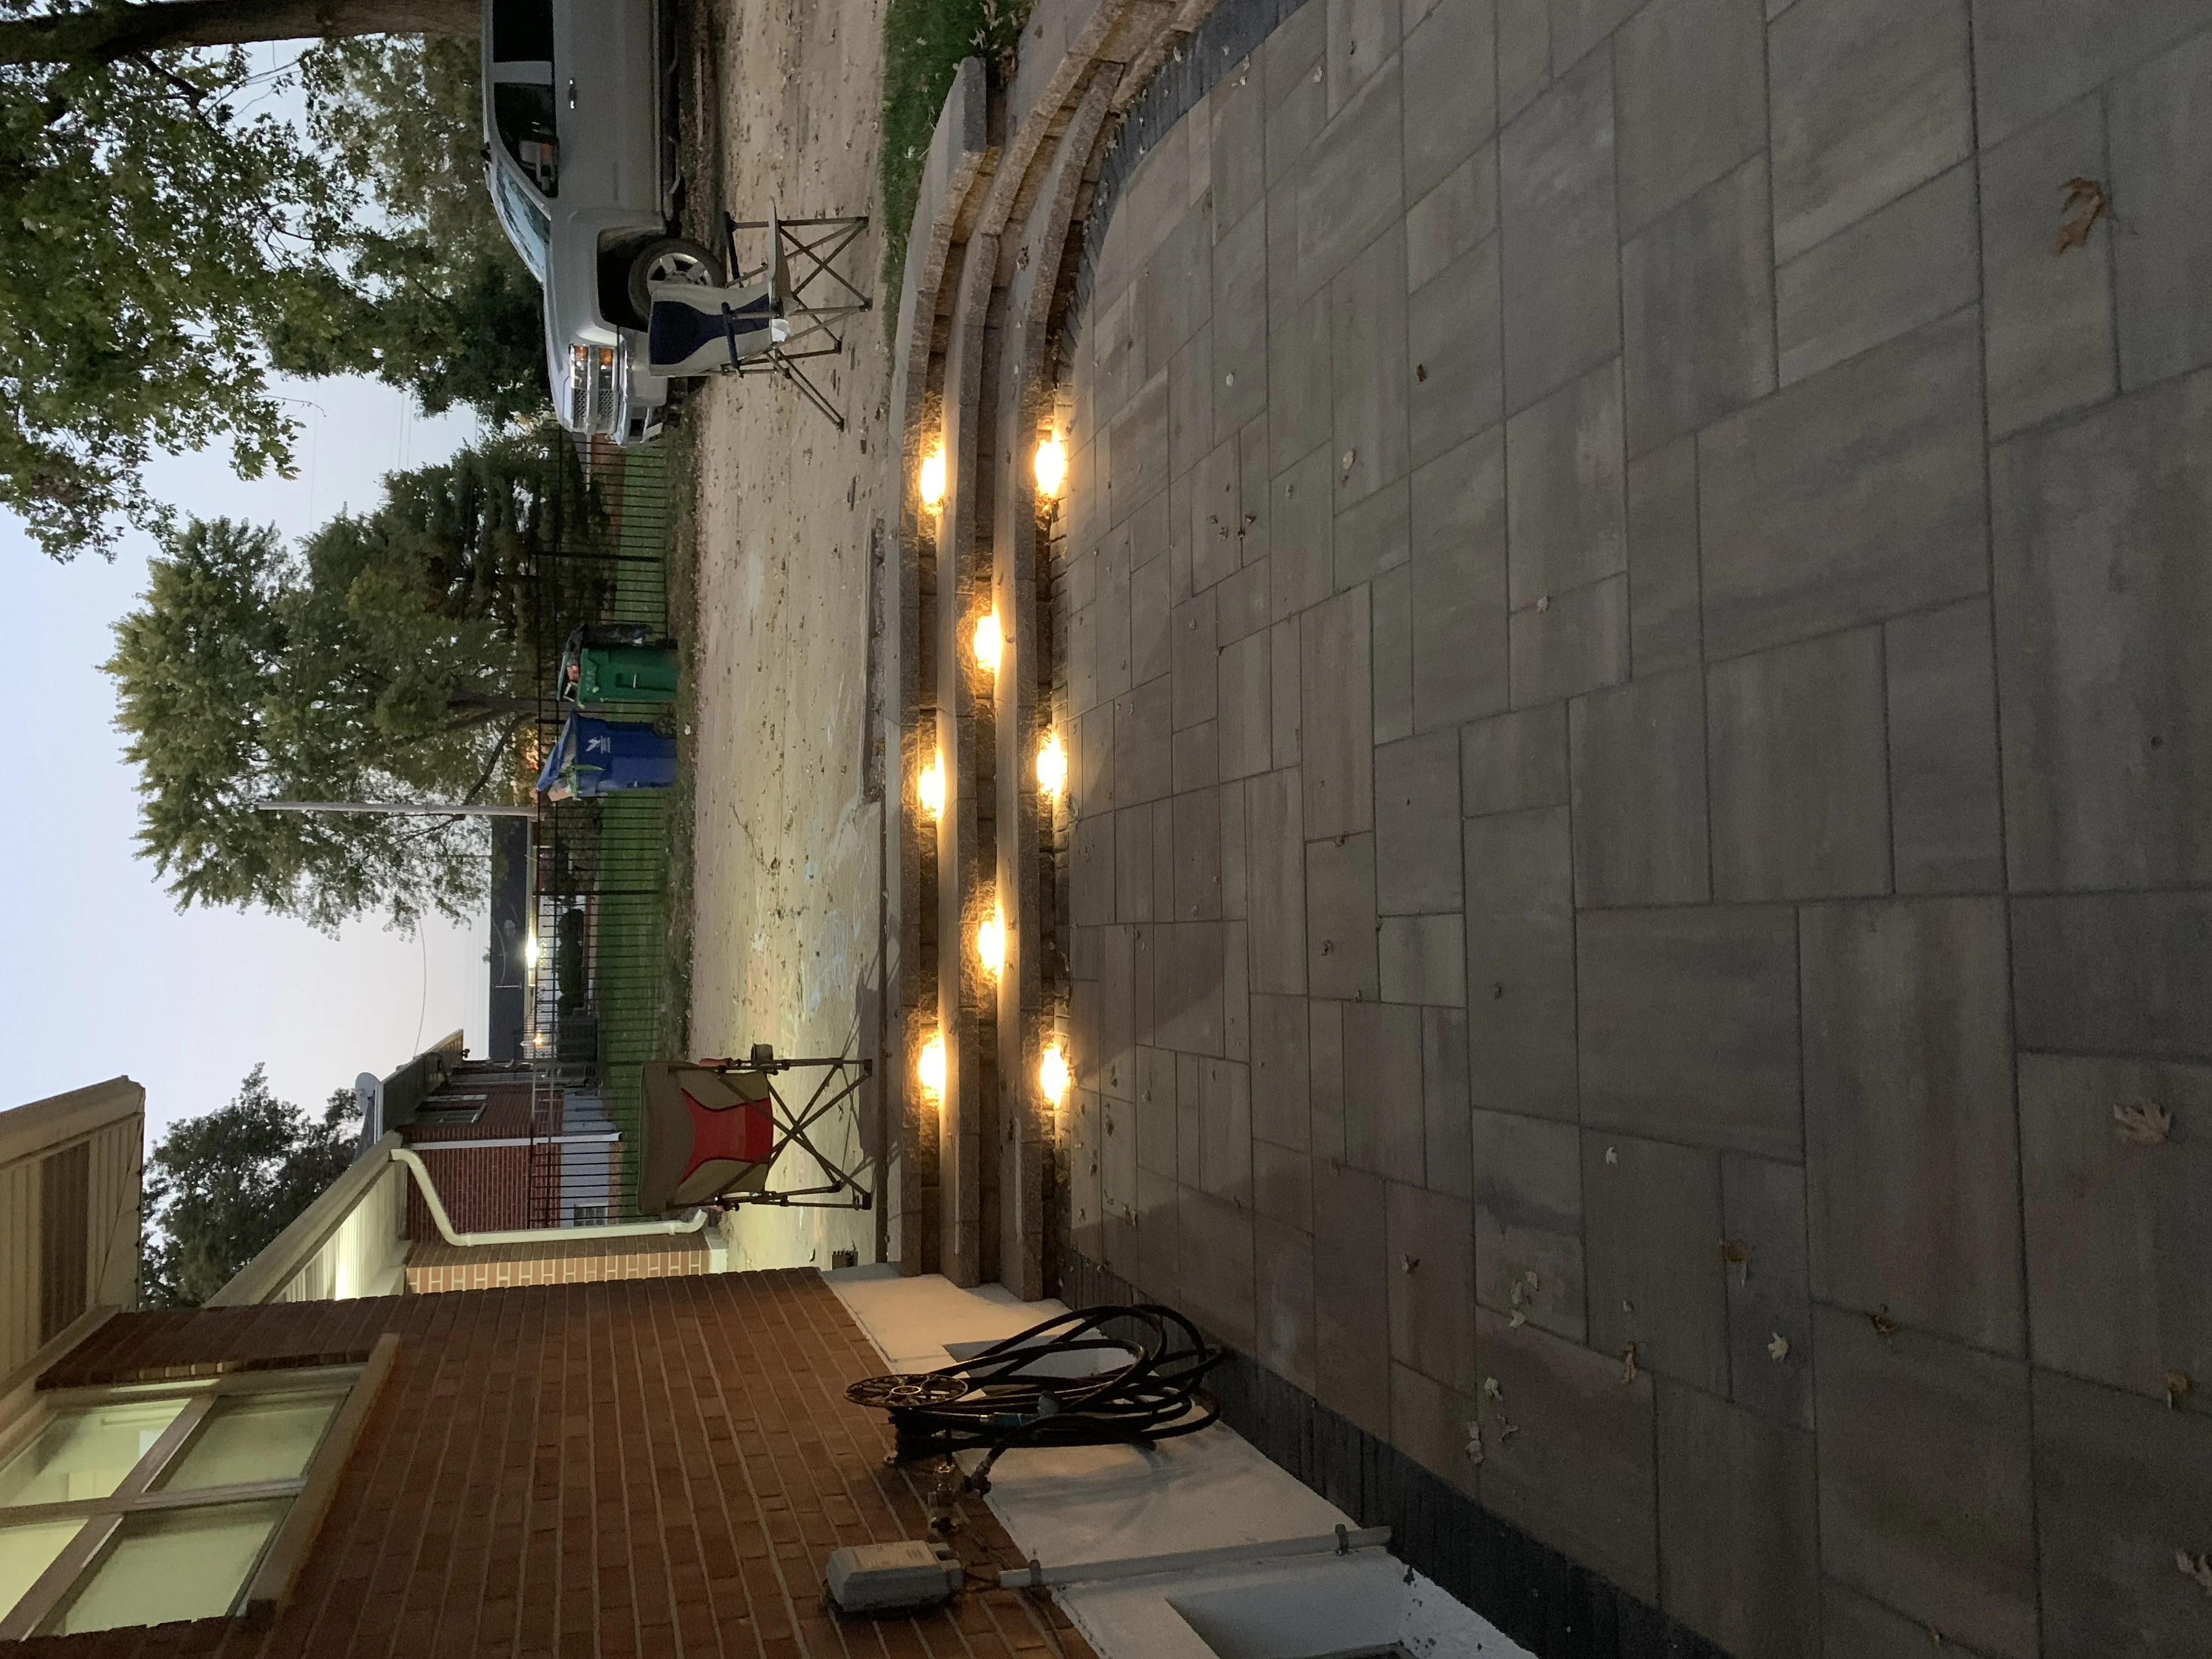
Step lights are small LED fixtures recessed into the riser face of outdoor steps or built into the caps of retaining walls. They cast a downward wash of light that illuminates the tread without blinding anyone walking toward them. This is one of the most important safety features you can add to any outdoor space with elevation changes.
If your property has a tiered patio with retaining walls separating the levels -- a common layout across St. Louis County and Jefferson County -- step lights built into the wall caps serve double duty. They light the steps for safety and they define the wall edge visually, which turns a functional structure into a design element after dark.
We typically install step lights during construction, routing low-voltage wiring through the wall before the caps go on. Retrofitting is possible but more labor-intensive because the caps need to be removed, drilled, and reset. If you are planning a new patio project this spring, tell your contractor upfront that you want step lighting so the wiring gets roughed in during the build.
Uplighting: Making Trees and Architecture Stand Out
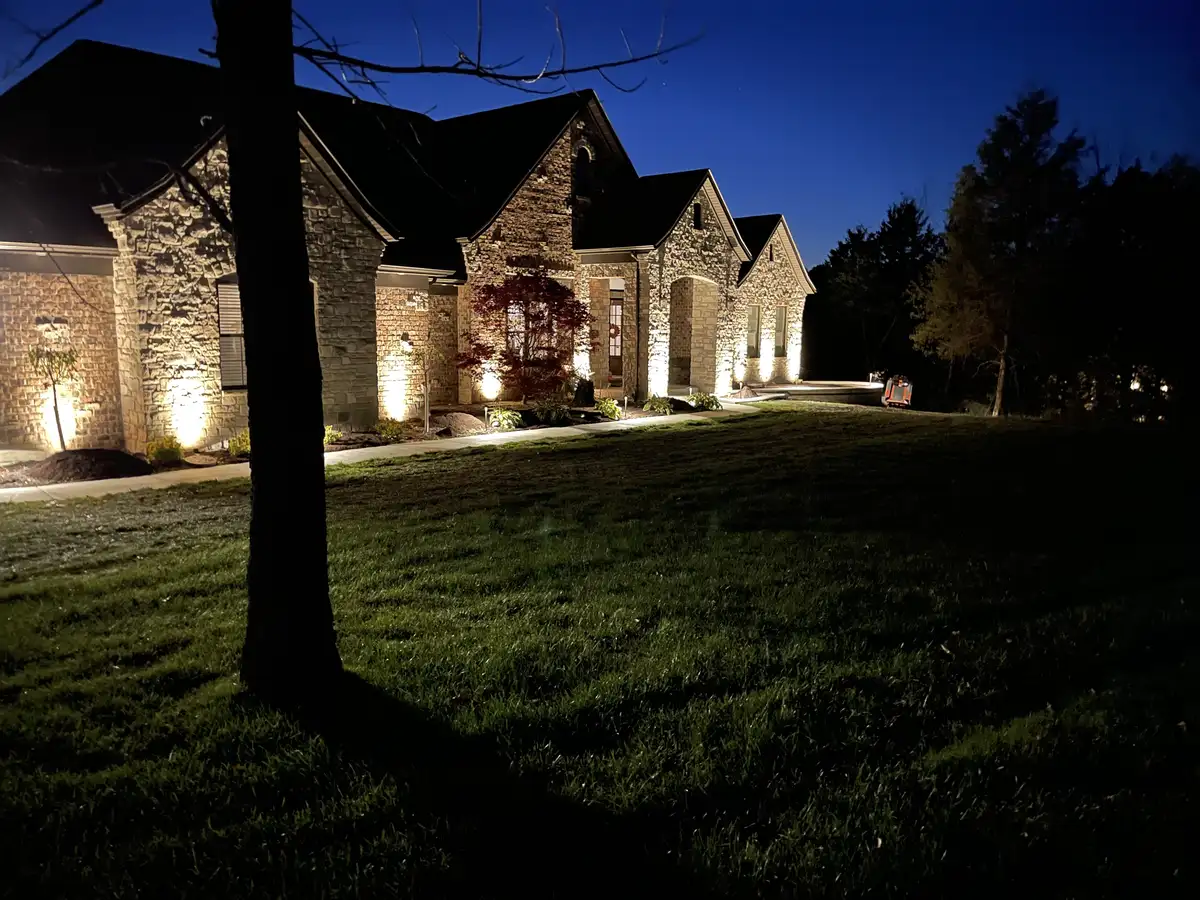
Uplighting is a fixture aimed straight up from ground level at a tree trunk, a stone facade, or an architectural feature. A single well-placed uplight on a mature oak, maple, or sycamore tree transforms the entire backyard at night. The light catches the trunk texture and filters through the canopy, creating depth and shadow that no other technique can replicate.
St. Louis has outstanding tree canopy compared to many Midwest metros. If you have a 40-foot pin oak or a sugar maple in your backyard, one or two uplights at the base will do more for the overall nighttime feel of your yard than 20 path lights scattered across the lawn.
Where Uplighting Works Best
- Mature trees with interesting bark or branching structure. Oaks, maples, and river birch are ideal candidates. Avoid uplighting trees with dense low canopies like Bradford pears -- the light gets trapped and you lose the shadow effect.
- Stone or brick facades. If your home has a stone veneer, brick exterior, or an exposed chimney, an uplight aimed at the wall from 12 to 18 inches away creates a dramatic wash that highlights the texture.
- Retaining walls and pillars. A retaining wall that looks functional during the day can look sculptural at night with one uplight every 8 to 10 linear feet.
- Outdoor living features. A stone fireplace, pizza oven, or kitchen island deserves accent lighting even when the fire is not going. An uplight on each side of a fireplace surround makes the structure a focal point all evening.
Patio String Lights: Instant Atmosphere
String lights are the fastest way to make any patio feel like a place people want to hang out. They work on pergolas, stretched between posts, run along fence lines, or suspended from the house to a freestanding pole in the yard. The warm glow they produce -- typically 2700K color temperature -- is flattering, relaxing, and immediately recognizable as the universal signal for "we are entertaining out here."
For St. Louis installations, commercial-grade string lights rated for outdoor use are worth the extra cost. Our weather puts serious stress on anything mounted outdoors year-round. The temperature swing from a 5-degree January night to a 100-degree July afternoon is nearly 100 degrees, plus wind, ice, UV exposure, and the occasional severe thunderstorm. Cheap string lights from big box stores typically last one season. Commercial-grade LED string lights with rubber-coated sockets and shatterproof bulbs will handle 5 to 10 years of Missouri weather without issue.
How to Hang String Lights That Last
- Use guide wire. Run a stainless steel cable between your mounting points first, then attach the string lights to the cable with zip ties or S-hooks. The cable carries the weight and wind load, not the light string itself. This prevents sagging and extends bulb life.
- Plan your power. Run a dedicated outdoor-rated outlet on a GFCI circuit to wherever your string lights start. Extension cords across patio surfaces are a tripping hazard and a code violation in most St. Louis County municipalities.
- Add a timer or smart switch. The best string light setups turn on automatically at sunset and off at 11 PM or midnight. A $25 outdoor smart plug handles this and saves you from remembering to flip the switch every evening from May through October.
Choosing the Right Color Temperature
Color temperature is measured in Kelvin (K) and determines whether your outdoor lighting feels warm and inviting or cold and sterile. For residential landscape lighting in the St. Louis area, this is the breakdown:
| Color Temperature | Look & Feel | Best Use |
|---|---|---|
| 2700K (warm white) | Soft, golden, candlelight quality | Patios, fire pits, dining areas, string lights |
| 3000K (neutral warm) | Slightly brighter, still warm | Path lights, step lights, general landscape |
| 4000K (cool white) | Bright, clinical, bluish tint | Security lights, utility areas (avoid for entertaining spaces) |
The most common mistake we see in St. Louis is mixing color temperatures. A homeowner buys path lights at one temperature, string lights at another, and step lights at a third. The result is a patchwork that looks disjointed. Pick one temperature for your entire system -- 2700K or 3000K -- and stick with it. The consistency makes everything look intentional.
Low-Voltage vs. Line-Voltage: Which Is Right for Your Property
Almost all residential landscape lighting installed today uses low-voltage systems -- 12 volts instead of the 120-volt line voltage that powers your house. Low-voltage is safer (no electrocution risk if a wire is nicked by a shovel or lawnmower), cheaper to operate, and does not require a licensed electrician for installation in most jurisdictions.
A typical low-voltage system consists of a transformer (mounted near an outdoor outlet), direct-burial cable run through the landscape, and individual fixtures that tap into the cable with waterproof connectors. A 300-watt transformer can power 25 to 30 LED fixtures comfortably, and the total system cost for an average St. Louis residential property runs between $2,500 and $8,000 installed depending on the number of fixtures, fixture quality, and complexity of the layout.
Line voltage (120V) is reserved for situations requiring high output: security floodlights, illuminating a large commercial sign, or lighting a sports court. For residential patios, walkways, retaining walls, and landscaping, low-voltage is the right choice every time.
Maintenance in a St. Louis Climate
LED landscape lighting is remarkably low-maintenance, but it is not zero-maintenance. St. Louis weather creates a few recurring tasks:
- Spring cleanup (March - April). After winter, check every fixture for damage from ice, fallen branches, or settling soil. Fixtures along retaining walls and in mulch beds sometimes get bumped or buried during freeze-thaw cycles. Straighten path lights that have tilted, clear debris from uplights, and test the transformer.
- Mulch season (May). When fresh mulch gets spread around planting beds, fixtures can get partially buried. Keep 2 to 3 inches of clearance around every path light and uplight so the lens is not blocked.
- Midsummer check (July). St. Louis summer storms can knock branches onto fixtures, push loose soil over direct-burial cable runs, and trip GFCI outlets. After any major storm, walk the system and reset the transformer if needed.
- Fall (October - November). Falling leaves collect around and on top of ground-level uplights. A leaf sitting on an LED lens for weeks will trap moisture and potentially stain or corrode the fixture housing. Blow or rake leaves away from all fixtures when you do your fall yard cleanup.
If your system is installed correctly with quality fixtures and proper connections, annual maintenance should take less than an hour. Compare that to the ongoing maintenance of a wood deck (staining, sealing, replacing boards) or the seasonal care of a garden bed. Lighting gives you a lot of impact for very little upkeep.
When to Plan Your Lighting Installation
May and early June are ideal times to install landscape lighting in St. Louis. The ground is workable after spring thaw, the landscaping is filling in so you can see where light is needed, and you get the entire summer and fall season to enjoy the system before winter.
If you are currently building or planning a new hardscaping project -- a patio, retaining wall system, or landscape renovation -- adding lighting during construction saves significant labor cost. Running wiring under pavers, through wall cores, and along footer drains is simple when everything is still open. Doing it after the project is done means tearing up finished surfaces or running exposed conduit.
Even if your outdoor space was built years ago, retrofitting landscape lighting is straightforward. Most systems can be designed, ordered, and installed within 1 to 2 weeks. The fixtures are small, the wiring is buried just a few inches underground, and the transformer mounts to the side of your house or a nearby post.
Get Started With a Lighting Plan
The best landscape lighting does not just illuminate your yard -- it changes how your property feels. Guests notice. Neighbors notice. And you will notice the difference the first evening you walk out onto a properly lit patio and realize you do not want to go back inside.
Travis will walk your property at dusk, show you exactly where fixtures should go, and put together a plan with pricing before any work begins. We cover the entire St. Louis metro including Jefferson County and St. Charles County. The consultation is free and there is no obligation.
Call us at (314) 630-8814 or request a free estimate online.
Browse our landscape design services, explore outdoor living options, or check out our project gallery for more inspiration from real St. Louis properties.